Easy Dynamic Deform Shader with Amplify Shader
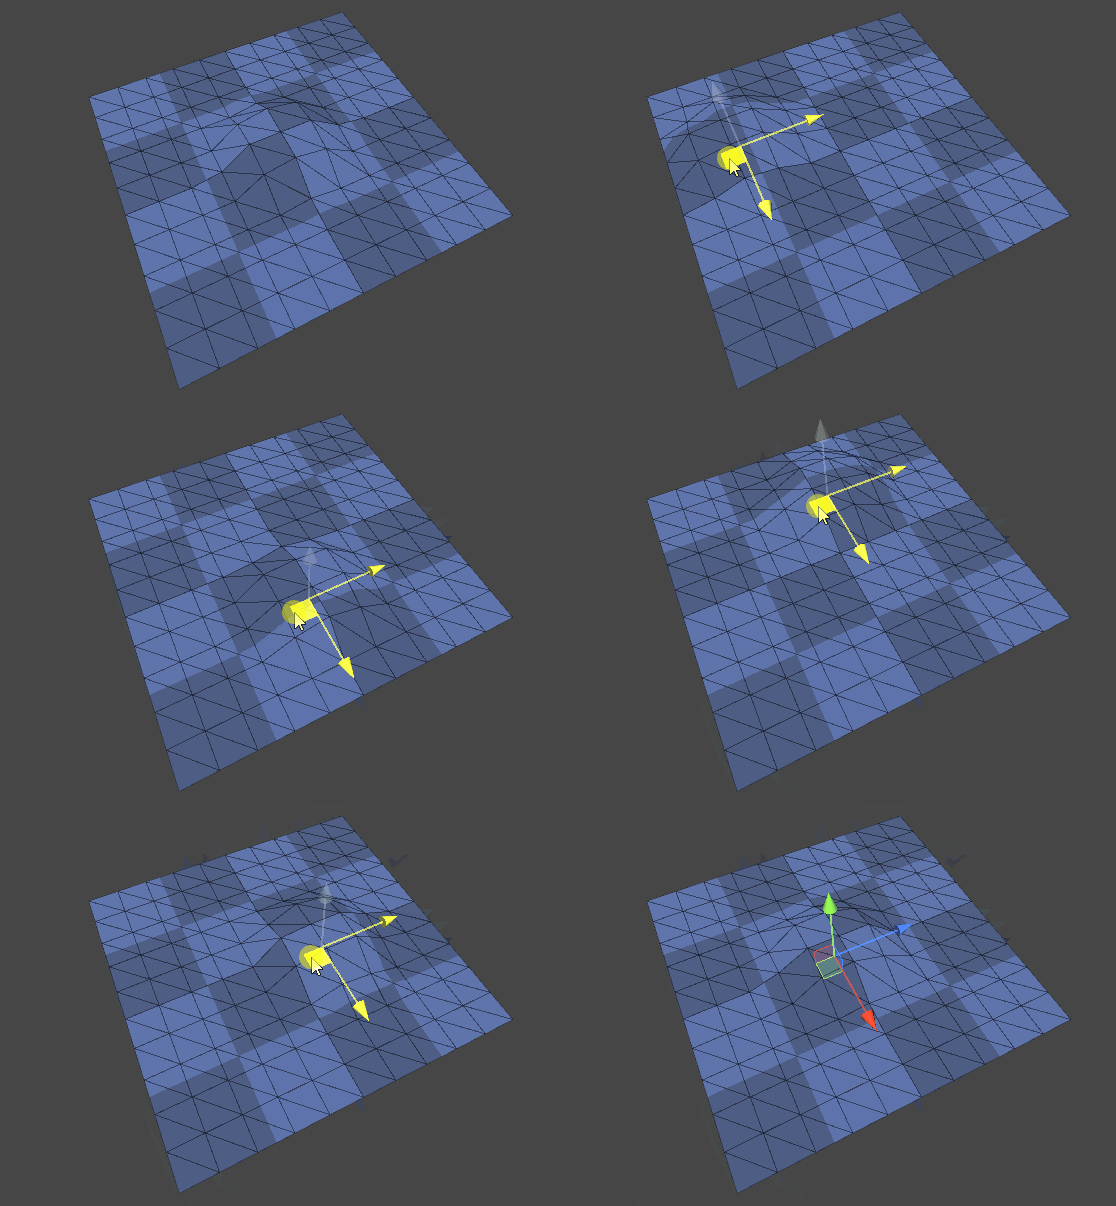
This is a walkthrough to for a Dynamic Deform Shader with Amplify Shader, to simulate something moving underneath a surface by bumping the vertices up.
The shader is inspired by Polytoots Rug Deform Shader Tutorial on youtube: https://youtu.be/TKkblNiklM0 but I did not like to use the Particle System plus RenderTexture, because I do not need the dynamic of having different shapes. Instead I just needed a simple circular shape with some adjustment parameters.
Another inspiration is Juicefoozle Bendy Grass Shader Setup here.

Dynamic Deform Shader – Walkthrough
I like to document Shaders step by step instead of just posting the Nodetree, as I tend to forget which nodes I need for which effects, and I think its a nice way to quickly look things up without meddling with older projects. Also I can share more easily what I have learned and figured out.
To start I create a Amplify Shader, call it “Deform”, create a Material out of it and throw it on a default plane primitive. It won’t have the highest resolution that way, but it is enough for demonstrativ purposes.
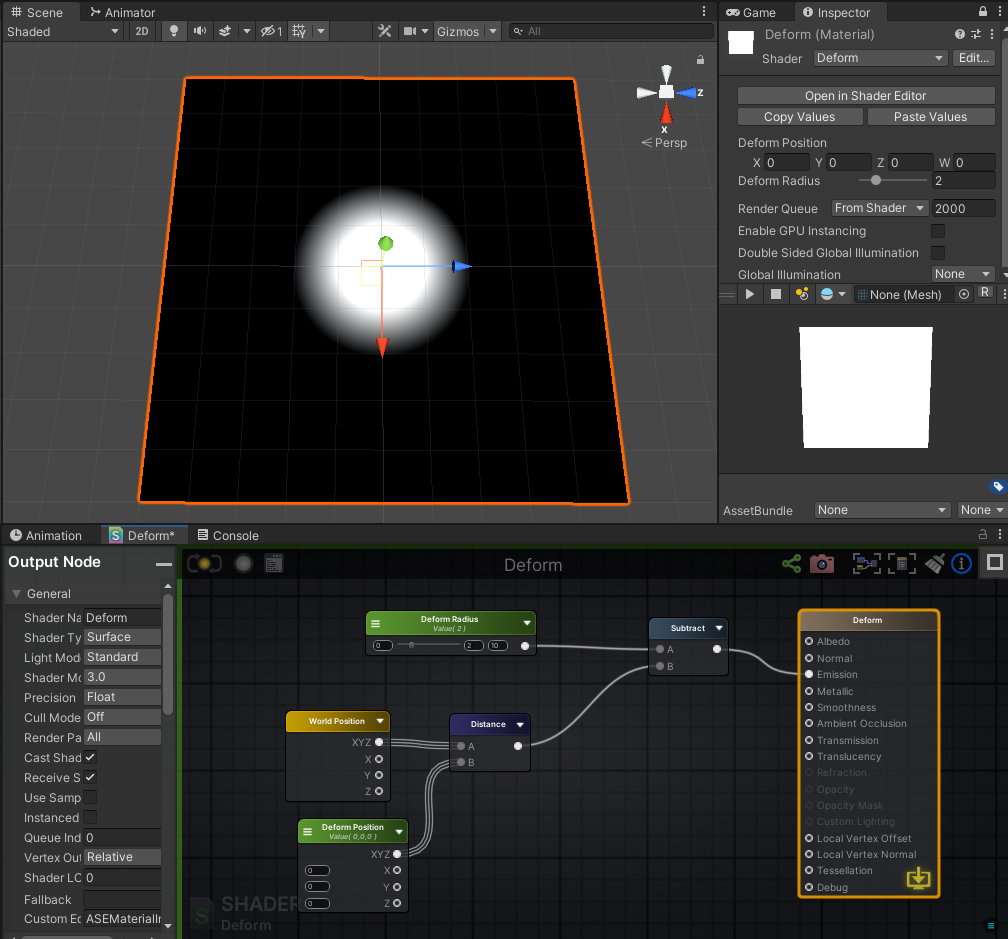
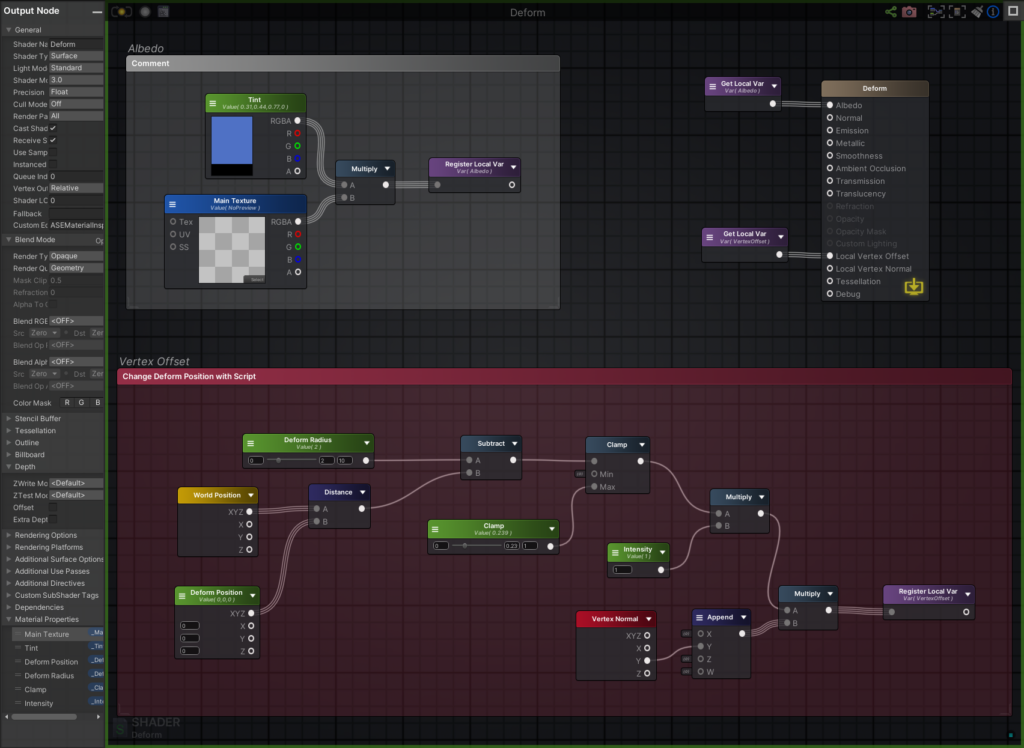
In the node view the first thing I create is a Vector3, then make it a Property and call it Deform Position, additionally I add a World Position Node and combine those two by using a Distance Node.
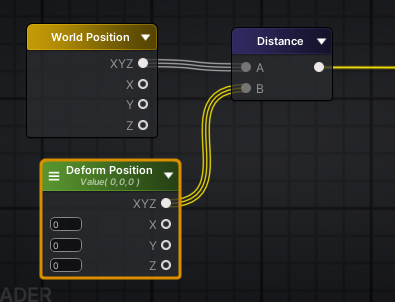
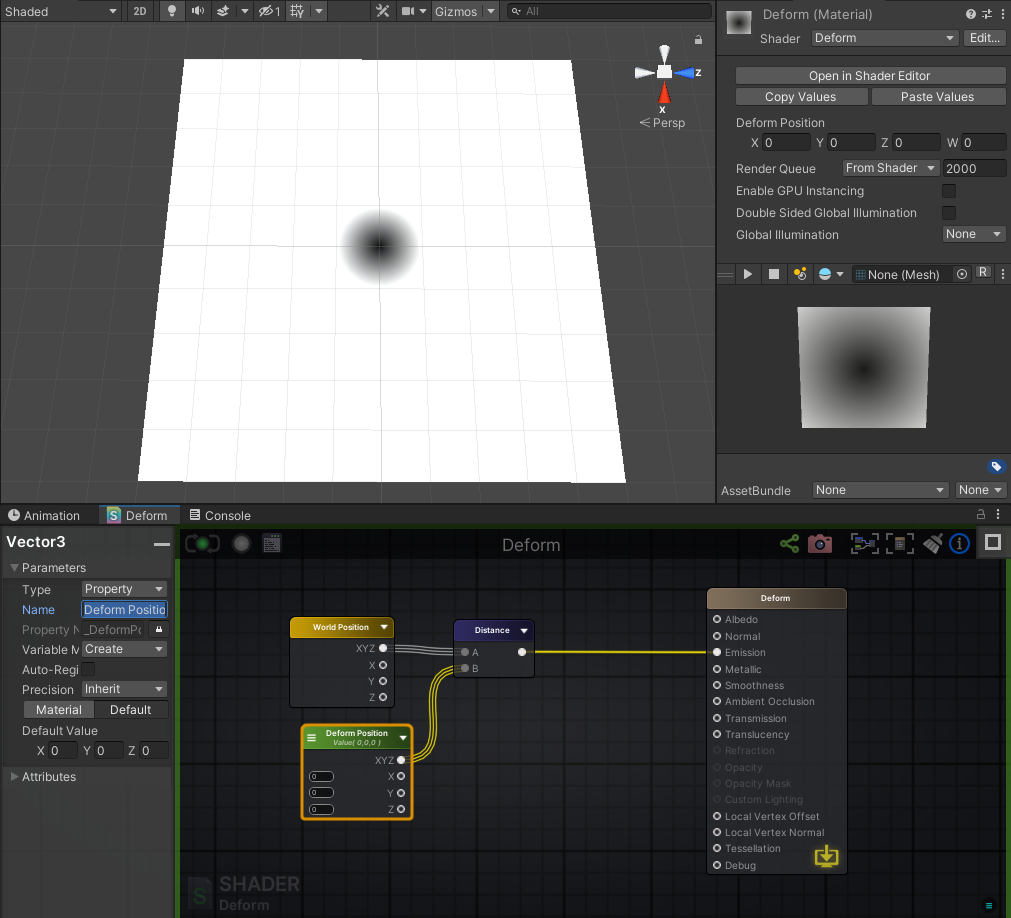
To see the direct effect, I make sure that my plane is positioned in the world at Vector3(0,0,0) and plug the Distance Node into the Emission, just to see what this setup creates.
So, Deform Position is at 0,0,0 in relation to World Position, as the Plane is at 0,0,0, and because of that there is a centered circle now visible in the center of the Plane.
Now I like to change the radius of the area. It can be achieve with a Substract and a simple Float. Also keeping in mind, that this is going to be my heightmap, so the colors must be inverted, as the bump should go up.
The order of how what to substract of what makes the difference:
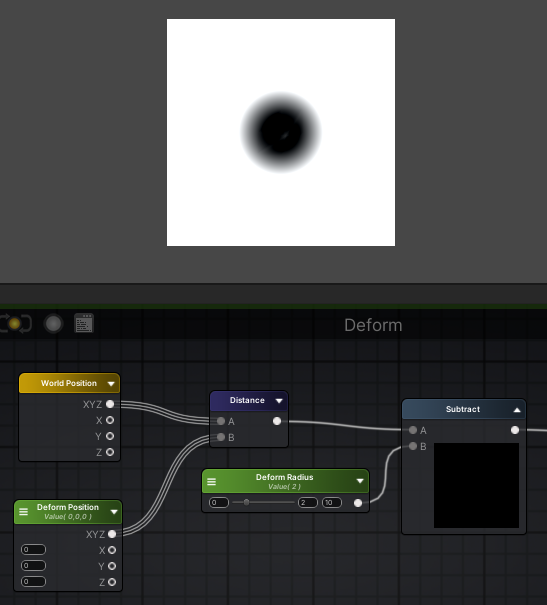
Changing the order to substract the Distance of my Radius. Boom inverted.
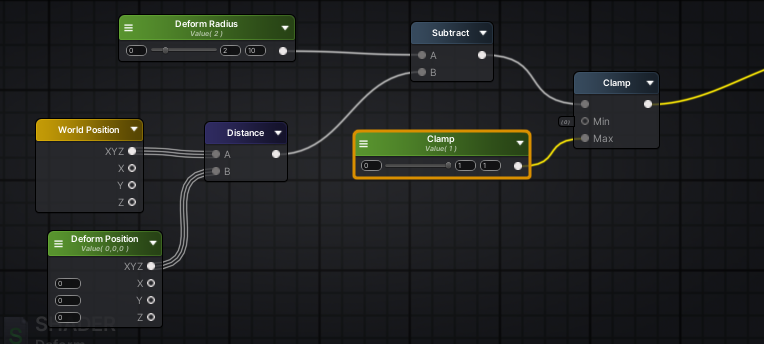
Next I add the Clamp, you can change the max value of the Float Range, because I think I later changed it to 10 or something. I usually just like to use the Range Slider for easier handling, but I tend to change the max value usually during the project until I find the final values.
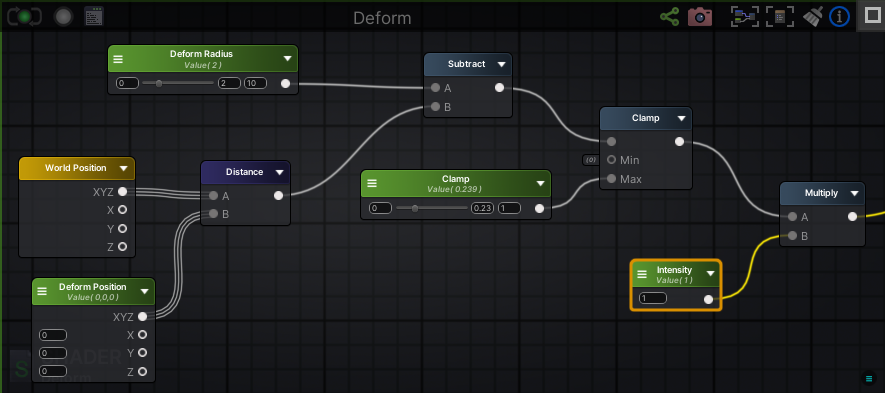
Another Float I add is for I call it Intensity and Mulitply it with the Clamp output.
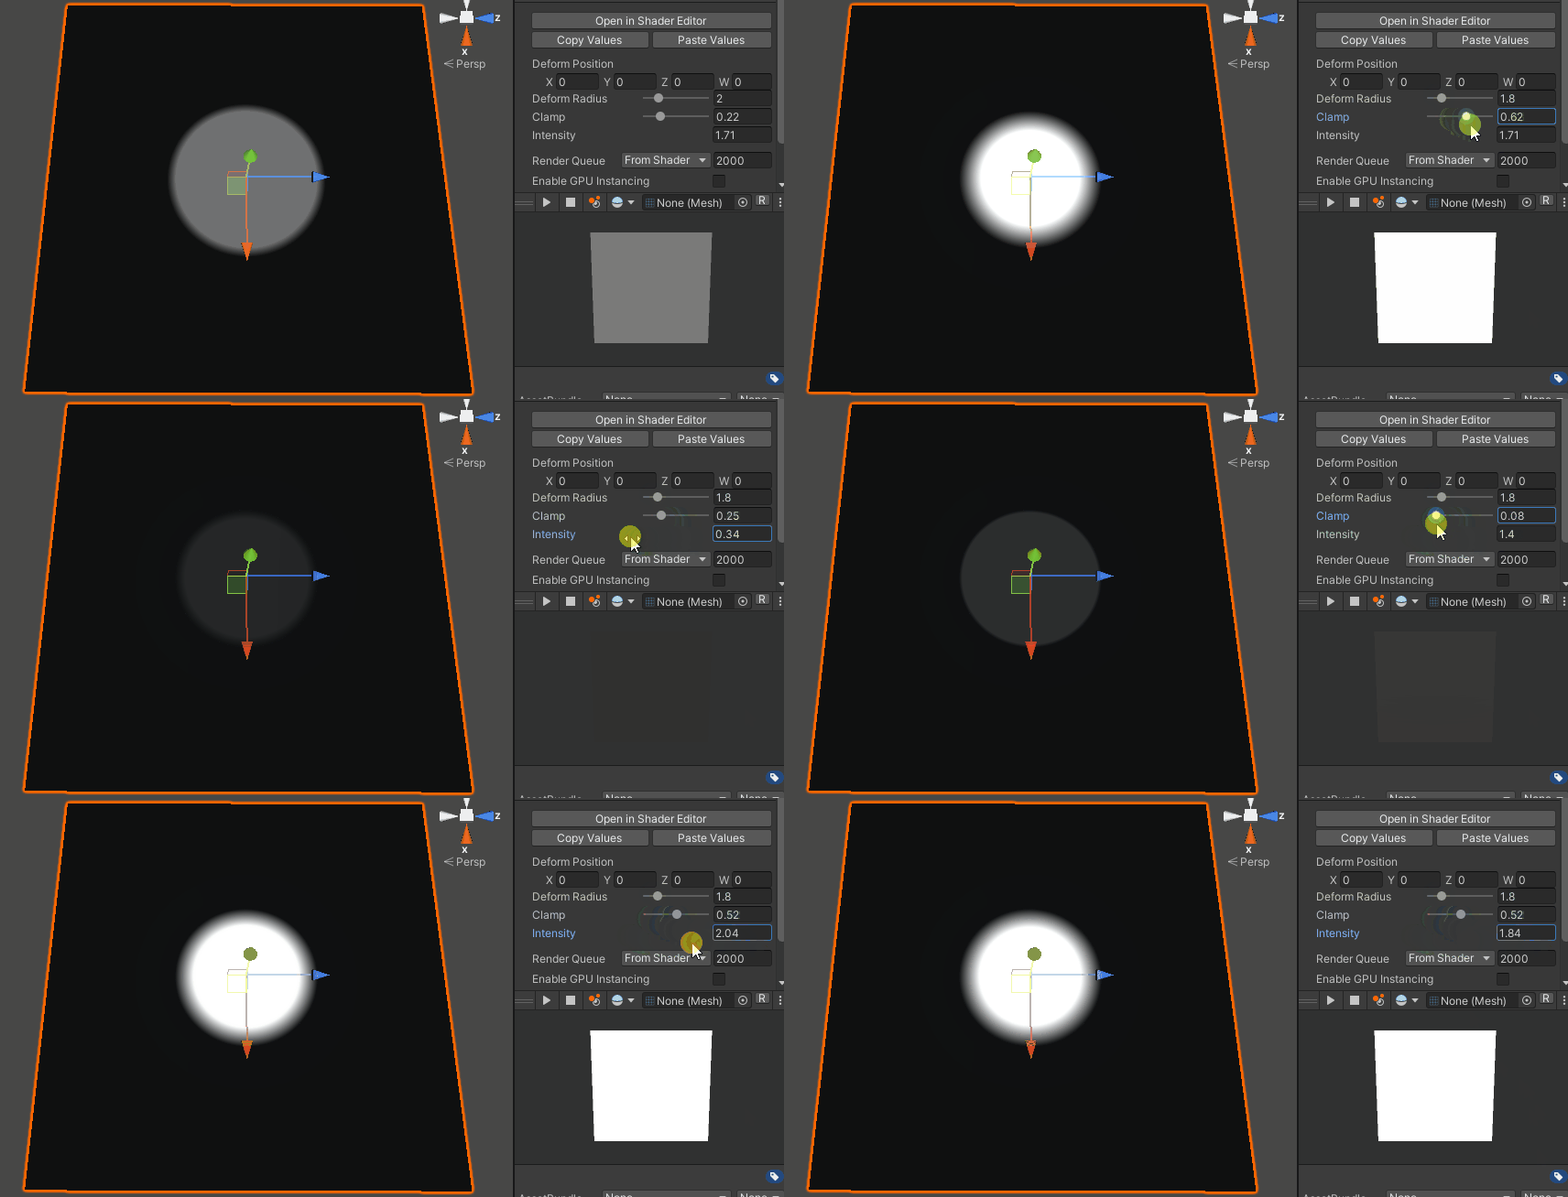
Shader finish
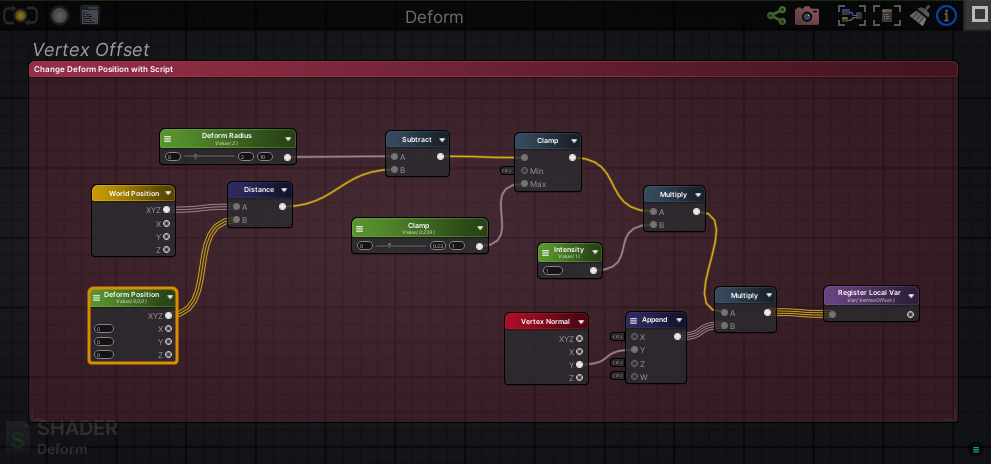
Now I just plug it into Vertex Offset, and the main functionality is added. At this point I also create a Texture Image and Multiply it with a Color, as a very basic Albedo setup.
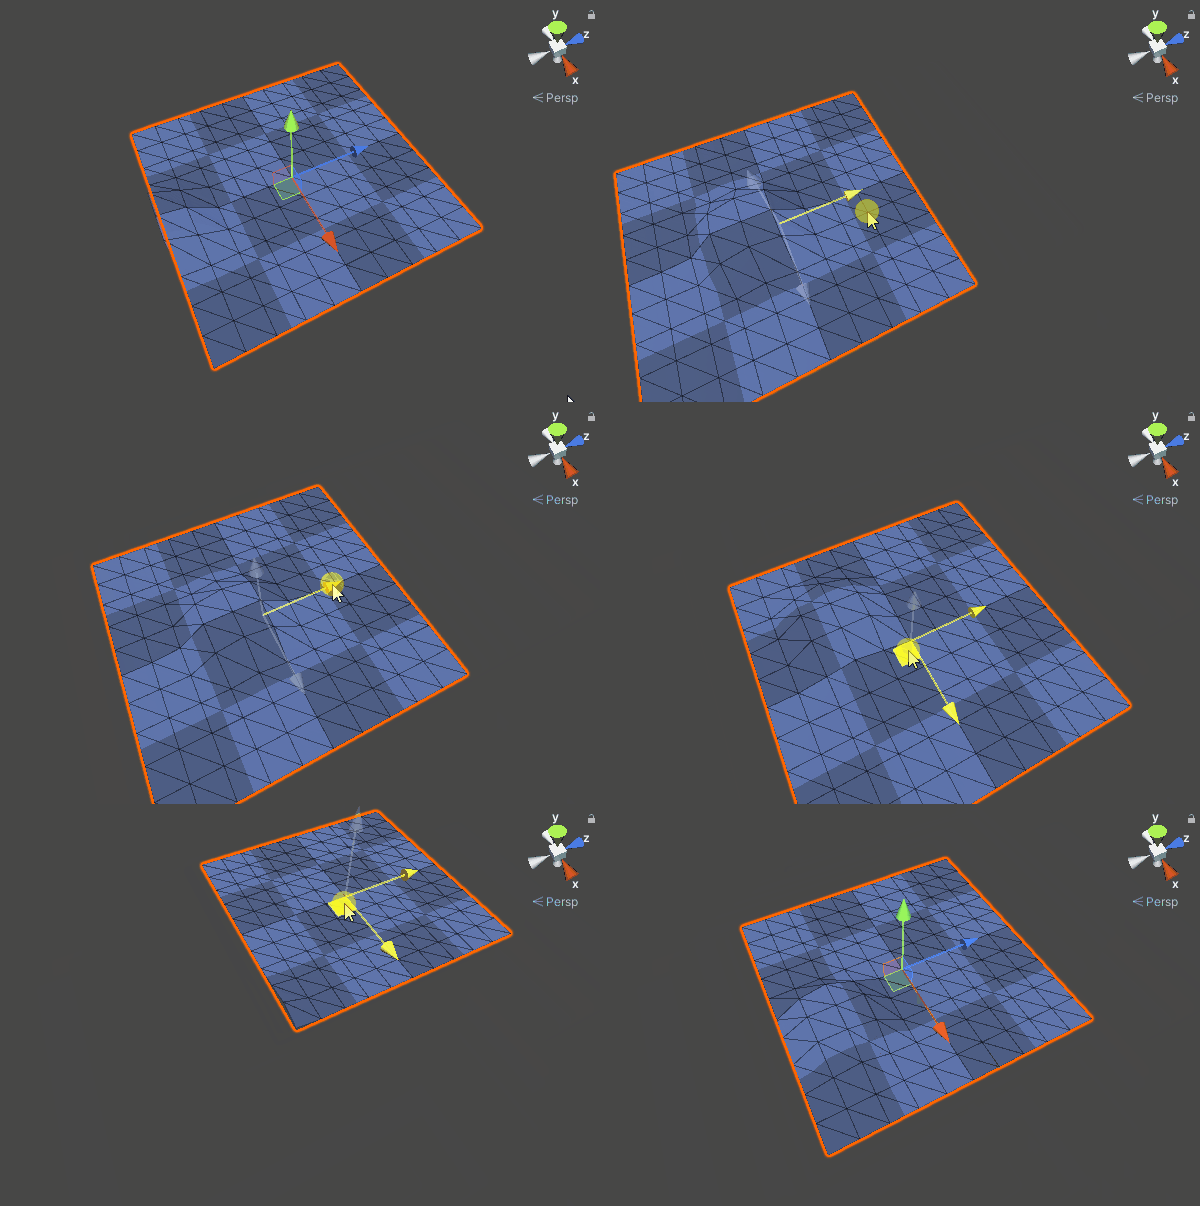
Make it dynamic
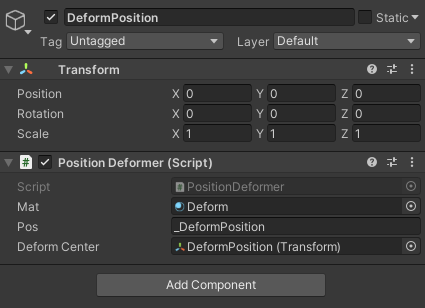
Next thing I do is adding an Empty Gameobject and attach a new Script to it.

It’s the very same script as used in the Bendy Grass Shader I referenced, I just changed some names. The Script will change the Vector3 defined earlier in the shader according th the position of the referenced transform.
using UnityEngine;

public class PositionDeformer : MonoBehaviour
{
    public Material mat;
    public string pos = "_DeformPosition";
    public Transform deformCenter;

    void LateUpdate()
    {
        if (deformCenter != null)
        {
            mat.SetVector(pos, deformCenter.position);
        }
        else
        {
            Debug.LogError("Deform Center not found.");
        }
    }
}

That’s it. Check out the referenced Links above, also check out my Vortex Shader :). Have fun.
Leave a Reply